MECHANICAL HAMMER- BUILDING INSTRUCTIONS |
||
11Build base |
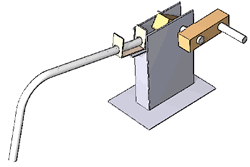 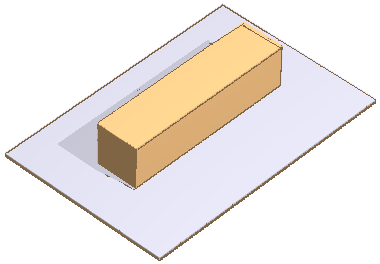 |
The size of the base is variable. The one shown here is for a single hammer and relies on the hammer head being supported by a surface, eg a table top. If you are making a multiple hammer, like the one shown on the keypage, you will need a larger base |
12Cut and score frame |
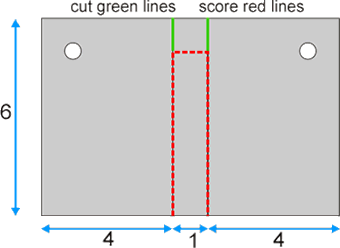 |
The width inside the folded frame should fit the wooden base block. Punch the 2 holes [5mm diameter] near the corners, as shown |
13Fold frame and glue to base |
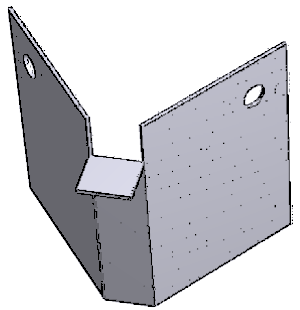 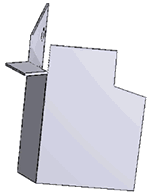 |
Fold the frame
carefully and bend down the small square 'hinge' that will hold the hammer
bracket. Glue the frame around the base block. If you are making a multiple hammer then you can cut away all the holes in the frames except the 2 at the ends, [see nearest drawing]. It will make assembly easier AND reduce friction. [Hmm... what's friction?] |
14Assemble
crank
|
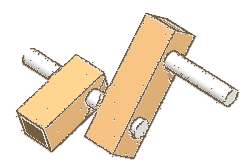 |
The CRANK and TRIP assembly are shown here 'outside' the frame. You will, however, have to fit the trip [ie the smaller piece of wood] between the card sides. |
15Form bracket |
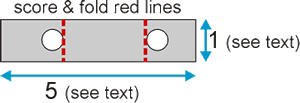 |
The bracket is made from stiff card. The length is not important but the width should be a little less than 1cm. Notice that the folds are right next to the 5mm holes - that's important. |
16Make up hammer |
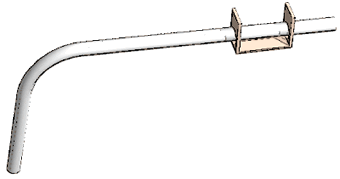 |
The hammer is made by bending a 15cm long paper stick. Make the bend about 5cm from the end. Fit the bracket but DO NOT glue. [not yet!] |
17Assemble & adjust |
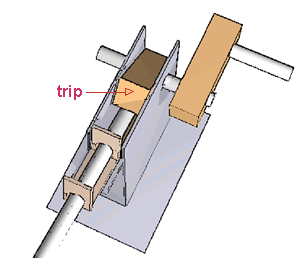 |
Glue the bracket to the hinge as shown - outside not inside! When the glue is dry slide the paper stick hammer shaft through the bracket until it reaches just under the LONG end of the trip. Make sure it doesn't touch the short end. You hammer will now operate once for every turn of the crank handle. NOW you can glue the paper stick to its bracket! DO NOT TRY TO TURN THE HANDLE THE WRONG WAY! [Why not?]
|