|
 |
||||||||
|
These
notes expand on the suggestions outlined in Unit 5A of the QCA Scheme of
Work for ICT. The work is
aimed at Year 5, but is also relevant for older pupils who have not had
the opportunity to explore graphical modelling and understand that
visual models can be used to identify patterns and relationships. In
the unit children learn how to use an object-based graphics package such
as the drawing tools in Microsoft Word and compare it with a paint
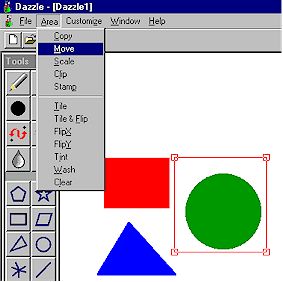
package such as Dazzle. It is assumed that pupils are already familiar with a painting package such as Dazzle or Paint.
|
|||||||||
| Setting the scene: Key idea: |
|||||||||
|
|||||||||
|
Short
focused tasks: |
|||||||||
|
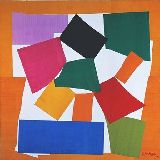
3. Show the class a copy of 'The Snail' by Matisse.
Discuss
the use of collage and how it allows elements to be moved individually.
|
|
||||||||
|
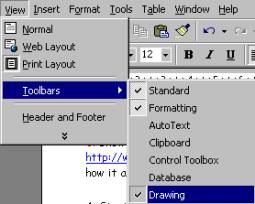
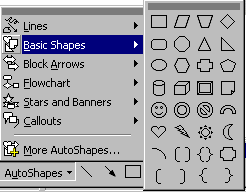
4.
Start Microsoft Word and open the Drawing toolbar by clicking on
|
|||||||||
|
5.
The Drawing toolbar will appear at the bottom of your page. |
|||||||||
|
|
|||||||||
| 6.
Demonstrate how geometric shapes can be drawn using the rectangle
|
|
||||||||
|
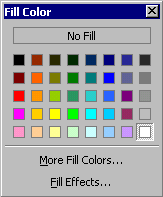
7.
Show how the Fill Colour
|
|
||||||||
| . | |||||||||
|
8.
Demonstrate how shapes can be copied
|
|||||||||
|
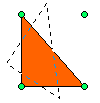
9.
Show how shapes can be re-sized and moved.
|
 |
||||||||
| Show
how they can be rotated using the free rotate button
|
|||||||||
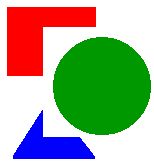
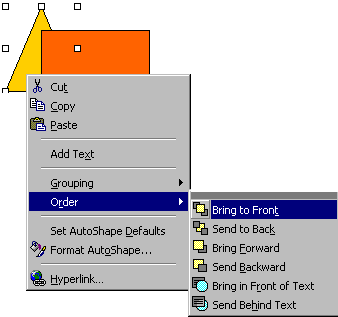
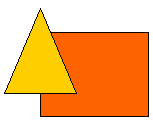
| 10.
Demonstrate how shapes can be layered: here a rectangle has been placed
on top of a triangle. With the triangle selected, click the right mouse button for a pop up menu. Select Order, Bring to Front and the triangle will appear on
top of the rectangle. |
|||||||||
|
|||||||||
|
|||||||||